Sunday, February 10, 2019

Crispy Fermented Roasted Potatoes

This is a recipe from Phickle. I loved these. My wife didn't. The next time I prepare them, I think I am going to have to segregate the potatoes in the oven between fermented and not fermented.

The Phickle recipe uses a half gallon jar. I used a pint, so I've adjusted the quantities appropriately.

Fermenting

The recipe calls for 2.5 pounds of small roasting potatoes. I used baby gold potatoes. I measured the quantity by seeing how many whole potatoes I could fit in my pint jar to reach over the top. The potatoes are going to be quartered, so they will take up less space. I'll need some head room in the jar for the fermentation weight and some room for an air gap above that. This technique seemed to work. It was a bit more than 1/2 pound or 5 potatoes.

Wash, but don't scrub, the potatoes and quarter them. Place one clove of garlic (I crush mine) in the bottom of the jar and pack it about half way with the quartered potatoes. The Phickle recipe calls for rosemary sprigs. I'm using dried rosemary leaves. I sprinkle some of those on the potatoes at the half-way point, and then finish packing the rest of the potatoes. There needs to be about 1.5 inches of head room in the jar.

Next, the half-gallon recipe asks for brine made with 2.75 cups of water and 1.5-2 tablespoons of salt. Those are kind of weird quantities to start with, and I need to divide it by 4. There is no problem with having too much brine. I'll make the math easy. There are 3 teaspoons to a tablespoon, so I am going to use 1.5 teaspoons of salt with slightly more that 1/3 of the 2.75 cups of water. Voila, 1 cup of water and 1.5 teaspoons of salt.

I added a fermentation weight and a Pickle Pipe and set it in the basement for a week.


Cooking

For cooking, preheat the oven to 400°F. Drain the liquid and place the potatoes on a foil-lined baking sheet. Drizzle olive oil over them, and toss them to coat. It would seem easier to do the drizzling and tossing in a bowl, first. I think I'll try that next time. Phickle adds more garlic and rosemary to the baking pan, but I don't see how that flavors the potatoes. I skipped that step.

Bake for 40-50 minutes until brown and crispy. That seemed like a long time to bake at 400 degrees, but the result was crispy on the outside, and puffy and tender on the inside. They had a nice tang to them. That's the part that my wife didn't like. Go figure. She ordinarily likes strong flavors. I loved them. I didn't take a picture of the finished product, though. That will have to wait until next time.

Friday, February 8, 2019

Kefir: Single vs. Double Ferment

I had mentioned double fermentation in a previous post. I've been double fermenting my kefir by a full 24 hours. The result is a product that separates into whey and a curdled substance that is yucky. It's not bad for getting whey that I use in other ferments, and for making kefir cheese (I haven't written that post, yet). It's not a good drink, though.

First, let's review the growth of my grains. In the past I tried to judge their growth by eyeballing the result. In some cases it was looking like they were shrinking. To be more precise, I started weighing them after each batch of kefir. I am seeing progress, but it is no wonder I wasn't able to notice the growth by eye. Over the last 4 days, the weight of my grains has grown from 7.1 to 9.0 grams. That's pretty good on a percentage basis, but not anything that I could see.

My kefir is getting thicker, too. So, now it was time to try a side-by-side taste test of single fermentation versus double. I divided this morning's finished batch into two containers and set one out for a second ferment. The other one went into the fridge. I left the second ferment out for about 6 hours and then put that one in the fridge.

After they had both chilled, I tasted them both straight up. They were both good enough to drink straight. The double ferment was noticeably sourer, and the single was sweeter. Both were pleasingly thickened--not so thick as yogurt, but thicker than milk. Given the choice, I would take the single ferment. I might try this, again, with flavorings added to the second ferment.

Thursday, February 7, 2019

Pickled Peppers

A few days ago, I packed a pint of peppers to pickle. I was following a recipe from Cultures for Health and modified it a bit. For one, I didn't use Jalapeños. They are too hot for me. I was looking for something like the sliced deli peppers that I buy at the grocery store.

Let's start with the peppers. The grocery store had a selection of peppers all labeled as "chili peppers." I bought these that were similar in color and size (after slicing) to the prepared peppers that I am used to buying. If you know what these are, leave me a comment.


The recipe is quite simple, just calling for sliced peppers, brine, and kombucha or raw apple cider. Well, I don't have any kombucha, or raw apple cider. On the other hand I do have whey strained from my kefir. The recipes in fermented foods at every meal often call for a tablespoon of whey with the brine to kick start the fermentation. Their recipes often call for just a few days of fermentation. I decided to go with that.

My version of this recipe is:

4 large peppers, tops cut off, seeds removed, and cut horizontally into rounds
Brine made from 1 cup of water and 1-1/2 teaspoon of salt
1 tablespoon of whey

This time, I decided to try removing the chlorine from my water. I boiled it in the microwave and set it out to cool.

These ingredients fit nicely into a pint mason jar with the fermentation weight, allowing a little head room for gasses to accumulate and vent off.


Taste Test

After about a week, I took out the fermentation gadgets and put the peppers in the fridge. There was a coating of thin white film at the top of the jar. This might have been a residue from the whey. I did not carefully filter the whey, I just poured it off from a jar of double-fermented kefir. It might also have been a type of yeast called kahm. It was above the fermentation weight. I just skimmed it off.

The peppers were hotter than I expected. Some friends suggested that I might be using banana peppers or cubanelle peppers. They came out rather limp. I might try these, again, or I might just stick with the store-bought version. I've had one sandwich with them added. It was pretty good.

Tuesday, February 5, 2019

Overnight Kefir Oats

Here's a nice use of my kefir for a healthy and tasty breakfast. I got this recipe from  fermented foods at every meal


The author's recipe is for four half-pint servings. It starts with 2-1/4 cups of kefir. Since, I have been making my kefir in 1 cup batches, I cut the ingredients in half. I started with kefir fermented with the Charlsie method. (See my previous post). 

They key ingredient in overnight oats is old-fashioned, slow-cooking oats. Do not use instant or quick oatmeal. I used Nature's Promise Irish Style Steel Cut Oats.

There is plenty of room to adapt this recipe for the ingredients that I had on hand. In this batch I used:

  • 1 Cup of kefir
  • 1/4 Cup oats
  • 1 Tablespoon chia seeds
  • 1 Tablespoon honey
  • 1/2 teaspoon vanilla extract
  • 1/2 banana, sliced (I've also used a few strawberries, cleaned and quartered)

Now, put everything in a mason jar and shake it vigorously. Put it in the refrigerator and enjoy it the next morning.


This is very easy to make, requires no cooking, and it is ready to eat in the morning.

I found this quantity to be a little too much for one serving, but not quite enough for two. Perhaps I'll use a bit more than a cup of milk in my kefir batch when I am planning this dish, use a little more oats, and keep everything else the same. That should make two satisfying breakfasts.

Overnight oats is not specific to kefir. Wholefully has a web page with lots of ads and distractions plus 8 variations on this recipe using yogurt and milk. I'll try some of those and report back.

So far, this is my favorite use for kefir.

Update:

I tried this recipe with 1/2 cup of oats to make a more satisfying double serving. That modification was based on the Wholefully.com recipes. I didn't add any fruit, but added peanut butter and cocoa. That tasted like a family recipe for bakeless cookies that I've been making since I was a kid. As a bonus, it is much healthier than the cookies. I'll be making this, again.
  • 1 Cup of kefir
  • 1/2 Cup oats
  • 1 Tablespoon chia seeds
  • 1 Tablespoon honey (Note to self: add the cocoa before you get the tablespoon gooey)
  • 1/2 teaspoon vanilla extract
  • 2 Tablespoons peanut butter
  • 2 Tablespoons cocoa powder

Monday, February 4, 2019

Continuing with the Kefir

Everyone says that making kefir is easy, and that is true. Making it taste good is still a challenge. Let's review my progress.

Growing the Grains

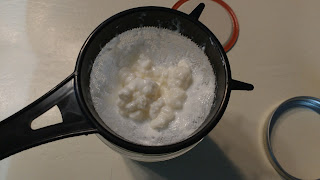
I've been told that my kefir will not be satisfactory until my grains start to reproduce. I think I have achieved that state, but I'd like to prove it scientifically. I've tried eyeballing the growth of my grains in photos like these (in chronological order) 

First, using the strainer for scale


Then, using a tablespoon measuring spoon for scale


That last comparison looks like they shrank. I don't think that's the case, so I've started using a kitchen scale. The scale is showing the weight in grams to one decimal place.


The next day, I noticed that the wax paper weighs about 1/2 gram. I didn't tare that off in the picture above. Now, starting again, and working with the theory that my grains might not be getting enough to eat, I ate half the grains to start my next batch with 7.1 grams of grains. I used the tare function on my scale to subtract off the wax paper weight.


Types of Fermentation

There are three processes that I have used for fermentation.

One stage ferment

This is the basic ferment where I add the grains to milk, let it sit for 24 hours and strain the grains out. I haven't found this product to be too palatable, but it is OK if I am doing something else with the kefir, like 
  • adding honey and/or fruit
  • mixing it 50-50 with orange juice
  • substituting it for milk in cooking
  • making overnight oats

Double ferment

This method is recommended by many kefir makers to make the drink more potent, enhancing B vitamins, and adding flavor to it. Some say it makes the kefir more sour. Some say it makes it less so.

The process is to follow the one-stage ferment process and set the strained kefir out for another 6-24 hours. I've only tried 24 hours. Some suggest that if my kefir separates from the whey like mine always does that I might be fermenting for too long in the second step.

Many people suggest adding flavors to the kefir before the second ferment. I've tried
  • coffee beans--not bad
  • vanilla beans--not that special, and they are rather expensive
  • sliced strawberries--pretty good. I still added a little honey
Some ideas for the future
  • cocoa powder
  • orange peel
  • banana

Charlsie ferment

Charlsie is the person who sold me my grains. She suggests combining the grains and milk as in the one-stage ferment, then she stirs the kefir and replaces the loose lid with a tight lid and puts the jar in the fridge for another 12 hours. At that point, she strains the grains, and the product is ready to drink. I've found this method to give a more pleasant taste than the one-stage ferment, but I still don't like to drink it straight.

Ratio of Grains to Milk

These three sources from the resources list below give quite an array of recommendations:

  • Dom suggests a 10:1 ratio of milk to grains by volume.
  • Crohn's Babe suggests 1-2 tablespoons of grains to a quart of milk.
  • Cultures for Health suggests 1 teaspoon of grains for up to 4 cups of milk. 

There are 192 teaspoons or 64 tablespoons in a quart (thanks Google), so there is some controversy here, but I think we can conclude that a grains to milk ratio between 1:10 to 1:192 is about right. Thanks guys and gals. I've been using about 1 tablespoon per cup of milk. That is a 1:16 ratio. Perhaps I should try cutting that back. Maybe my grains aren't getting enough to eat.

Continuing with my careful measurements of the grain growth, my next batch has 7.1 grams of grains and 240 grams of milk (1 cup). That's a 1:34 ratio.

Resources

I've found these web sites useful. Donna Schwenk's video also has a section on kefir cheese (similar to cream cheese).

Cultures for Health second fermentation video
Phickle They've got lots of other fermentation information and recipes on their site.

Sunday, February 3, 2019

Yogurt

I've been eating store-bought yogurt for many years. Some have suggested that my original attempt to make kefir from store-bought kefir was actually yogurt. Considering how easily it thickened, that may be right. Now, seemed to be the time to try making yogurt on purpose.

One motivation is economics. I pay $1.29 for a container of yogurt that is about 3/4 of a cup. A gallon of milk is $2.59. If I can turn that gallon of milk into twenty-one 3/4 cup servings of yogurt, the cost of one serving comes down to 12 cents. OK, saving $1.17 per day on yogurt is not going to fund my retirement.

Another good reason to make yogurt myself is that I know what is in it. The whole theme of this blog is to nurture the microbes that have taken residence in my gut. The yogurt container says it has live cultures. I believe it, but making new yogurt from the store-bought is proof.

The other issue is fat versus sugar. Many of my favorite yogurt flavors proudly proclaim that they have 0 grams of fat. Unfortunately, they make up for the lack of fat by adding sugar. There isn't too much fat in my diet, but there is too much sugar. So, that settles it. I'm going to make my own yogurt.

I found instructions in a book titled fermented foods at every meal (yeah, they didn't use capital letters) by Hayley Barisa Ryczek.


The process starts with a confusing step to heat the milk to 185°F and then letting it cool to 110°F. Why not just heat the milk to 110°F and be done with it? I guess the answer has to do with a change in the protein structure that happens when the milk is heated. I dutifully followed directions. This process took quite a bit of tending and it left a film on the bottom of the pan that was difficult to clean. I might try a Pyrex measuring cup in the microwave next time. Once I figure out the heating time, that process should be repeatable.

Update: Next time I tried the microwave. I started with 12 oz of milk from the fridge. I nuked it for 2 minutes, and that brought the temperature to 100 degrees. Then, another 30 seconds for another 20 degrees. Another minute brought it to 160 degrees. I stopped it after an additional 40 seconds when it started to boil. My thermometer read 200 degrees. Next time, I am going to try 3:30 and see where that leaves me.

The milk took much longer to cool to 110 degrees in the Pyrex measuring cup, than in the pan. I had to wait about 40 minutes. Still, I like this method better. I can just toss the measuring cup in the dishwasher. The pan was a little troublesome to clean.

My recipe called for a quart of milk and 1/4 cup of yogurt used as a starter. I was just experimenting, so I used 1 cup of milk and 1 tablespoon of yogurt. I wanted to test two brands of commercial yogurt for live cultures, so there were 2 cups of milk total.

Another confusing step in the recipe asks me to combine the yogurt with an equal quantity of milk before adding it to the rest of the milk. Why? I don't see any reason for this. I just put a tablespoon of yogurt into a mason jar, added a cup of milk, and shook the contents.

Incubation

The next step in the process is to incubate the yogurt for 8 to 24 hours. There were many ideas suggested for keeping the developing yogurt near 100°C during the incubation. I have an electric thermal storage heating system in my house. The night before my yogurt trial, I put a mason jar filled with water on top of the heater. In the morning, the water was around 90°F. That seemed close enough for me. I'll need to explore some other options after the heating season is over.

I incubated my yogurt for about 20 hours. 

Results

My starter cultures came from a carton of Chobani yogurt and from a carton of Stonyfield Farm yogurt. Both claim to have live cultures, and both yielded successful homemade yogurt. Hence, there are live cultures in both brands, as advertised.


I tilted the jars here to show that the yogurt thickened properly. The yellowish color is just a remnant of the lighting. The yogurt was the expected off-white color and it tasted like unsweetened yogurt. Chalk up another success.

I've read that the incubation time will affect the sweetness of the yogurt. The longer that it incubates, the more lactose (milk sugar) that the bacteria eats, and the more lactic acid it produces. Thus, shorter incubation periods yield sweeter yogurt. I'll experiment with that in the future.

Friday, February 1, 2019

Understanding Kefir Grains

I think I'm starting to understand why everyone says that it may take a few cycles to activate some sleepy kefir grains. My vendor told me that they needed to start to reproduce before I would get satisfactory results. Now, my grains are multiplying and my kefir is much more palatable.

I added some strawberries to my batch a couple days ago, and it was rather good. I didn't need to add any other sweetener.


Notice how the kefir is getting thicker.

I think the idea is that until the grains are very active, I have just been making sour milk, instead of kefir. No wonder it tasted so bad.

After straining the grains for this batch, I separated out about one teaspoon for the next batch (about half of the grains) and ate the rest. After the next cycle, I ended up with about twice as many grains. It's not obvious from this picture. I'll be more scientific next time.


The batch that is working, now, used all the grains from the photo above. I'll post an "after" picture tomorrow.

I'm glad that I didn't give up.

Wednesday, January 30, 2019

Kefir from Grains update

I contacted the person who sold me my kefir grains. She has been very helpful. She suggested that the grains need to start reproducing before my kefir will be satisfactory. In the meantime, I was on vacation for a week, so I needed to put my grains on vacation hold. I'm told that I should add them to a cup of milk and put them in a jar in the fridge.

OK, that's done, and I'm back from vacation. I strained my grains from the vacation jar and they look like this:


I'm told that I can drink what is left if it tastes and smells OK. I'm giving that criterion a no vote. I saved it for cooking, though. I've been using the unsatisfactory results as a substitute for milk in my sourdough bread, and to make waffles.

I made a batch of kefir with those grains and a cup of milk. After 24 hours, I strained the grains and set the kefir back on the shelf for a second ferment, but with no added flavors. The grains now look like this:


They do seem to be growing a bit. The resulting double-fermented kefir was very sour--almost undrinkable, but I added two teaspoons of honey and a little vanilla extract. I drank it, and didn't puke, but it is not something I'm looking forward to consuming, again.

For the next batch, I chose to follow the procedure recommended by my grain vendor. She adds the grains to milk (in larger quantities), sets it on the shelf for 24 hours, stirs it, recaps it and puts it in the refrigerator for another 12 hours. The refrigerator cycle is with a tight lid and the grains are still in it. After these 12 hours, she strains the grains and drinks the result with a 50-50 mix of orange juice.

My grains after this cycle look like this:


So, they do seem to be growing. The kefir/orange juice mix was quite drinkable, but I'm still not crazy about it. My kefir is starting to come out thicker. Maybe I'm getting there, but I'm still considering the $5/quart store-bought kefir as a backup plan.

I'm not giving up, yet. I've got another batch in the cellar, now.

Friday, January 18, 2019

Kefir Double Ferment

I'm still having some trouble with the taste of my kefir. It has been suggested that it might just take a few cycles for my grains to start reproducing before my kefir thickens properly.

Crohn's Babe's How to Make Kefir 101 video suggested that the double fermentation made a "potent and very sour kefir." That was hardly what I was after. My kefir is plenty sour already.

On the other hand, Cultures for Health has a video that describes double fermentation as a way to add flavor to your kefir while making it less sour.

Well, it can't make it more sour and less sour. I guess I should find out for myself. The Cultures for Health video suggested adding orange or lemon peel, cinnamon sticks, tea bags, or vanilla beans. I didn't have any of those, so I decided to add a few coffee beans.

The result was significantly less sour, and it took on the flavor from the coffee beans. My kefir is still a little lumpy, but this was a big improvement. I might try cinnamon sticks, next.

Thursday, January 17, 2019

Pickles

I like pickles. Making my own fermented pickles is something I have been looking forward to, but online advice suggested that I do not start with that. So, I've made carrots, sauerkraut, and kefir. I'm ready for the pickles. I chose the recipe that came with my fermentation kit.

There were numerous issues. Let's start with the cucumbers. The recipe asks for 1 pound of kirby cucumbers--the smallest ones I can get and all the same size. Well, I found them at the grocery store, and they were all the same size, but that size was HUGE. There were four big fat cukes in a one-pound package. I was not looking to make a meal out of one pickle, so I opted for these One Sweet Cucumber snacking seedless cucumbers. They are all about the same size and I am confident that I can fit more than one in a one-pint mason jar.


The recipe called for a grape leaf. I don't even know where to look for one of those. It says I can substitute a second bay leaf. Okay. Maybe I should have just used one bay leaf in the first place. I am adapting a 1 quart recipe for a 1 pint jar. Oh well, too late for that, now.

The recipe calls for 1 dill flower or 2 tablespoons of dill seeds. I have dried dill weed. It will have to do.

The recipe also calls for 1 teaspoon of black peppercorns, but never tells you to do anything with it. I just put a couple dashes of pepper into the jar.

Garlic cloves. Hey, I've got those. The instructions say to put all of these items in the jar while the cucumbers soak in ice water. As with the dilly sticks, the garlic cloves get in the way of the packing. I think I'll put them in after the cucumbers, next time.

Now, I understand the difficulty with making pickles. The cucumbers need to be packed whole while still leaving some head room in the jar. Mine were a little too long. Once I packed the pickles, the Pickle Pebble (fermentation weight) protruded above the rim of the jar. Try saying that fast, "Once I packed the pickles, the Pickle Pebble peeked past the perimeter."


I squished them down as well as I could without bruising them.

Now, the instructions tell me to pour the brine over the cucumbers after I have placed the fermentation weight. That seemed an unnecessary difficulty. I did it in the other order. It's a pretty tight fit, vertically. The instructions wanted the weight and the cucumbers to be covered with brine, but there is no room for gas at the top of the jar that way. I poured out some of the liquid after I put the Pickle Pebble in place.

Unlike the sauerkraut, the pickles are expected to shrink and sink lower as the fermentation proceeds. I hope that is true. I don't want to have liquid spilling out of the top of the Pickle Pipe.

Fermentation is expected to take 2-4 weeks. I'm supposed to wait an additional week after the fermentation stops before sampling.

Taste Test

I tasted these pickles after 3 weeks. The brine had gotten cloudy as expected. They seemed ready. The pickles taste good enough, but the process has made the pickles a little limp and it is as if their insides have been sucked out. That might be because of the type of cucumbers I used. They still have a crisp outside, but I prefer store-bought Claussen pickles to these.

Getting the right kind of cucumbers is a big challenge for a pint-sized jar. They need to be small and all the same size. I might try this again, when fresher pickling cucumbers are available. I might need to get some quart jars for this to work well.

Wednesday, January 16, 2019

Kefir from grains

Having had some success with making kefir (or maybe yogurt) from store-bought kefir, (See my blog post about that process) I decided to try making it from grains. I found the grains on etsy.com. There were many sellers to choose from. One of the sources was a farm (I think it's a farm) in the state where I live. I figured that minimizing the travel was a good idea. I ordered my grains, and they arrived in a couple of days in a small jar with some milk.


I followed the procedure from this video

How To Make Milk Kefir 101


My product did not thicken up like pudding as the video suggested, but it looked much like her product. The result was so sour it was undrinkable! 😜 It was much improved with a teaspoon of honey. Still, it wasn't as good as the store-bought beverage or the kefir that I made from the store-bought beverage.

I do seem to get more grains out than I started with. That suggests that something right is happening.


The vendor who sold me the grains suggested that it might take several cycles before the result is satisfactory. I've heard that from other sources, too. I'm still working on that.

A video from Cultures for Health suggested that my result might be due to a cooler fermentation location, and it might take longer than 24 hours. I culture my kefir in the storage room where our heater is. It's the warmest place in the house. It's in the mid 70s Fahrenheit in there.

My grain source suggested that if the kefir is too thin, I should try adding less milk. I've been using about a tablespoon of grains and one cup of milk. Cultures for Health suggests that one teaspoon is enough for up to 4 cups of milk. This is going to take some experimentation.

I have used my kefir in cooking with good results. I substitute it for the milk in my sourdough bread.

For drinking, though, I think I need to go back to the Google search to see how I know if I made kefir or just sour milk. 🙂

Maybe paying five bucks a quart for something that tastes good isn't so bad. I'm not giving up, yet, though.


Monday, January 14, 2019

Sauerkraut

For my second food ferment, I am trying to make red sauerkraut. This is the first recipe in the book that came with the fermentation kit. The book is also available online. I chose red cabbage, because I find it has more flavor than green cabbage.

As with the Dilly Sticks, the recipe is for a quart mason jar, and I am using pint jars. The first ingredient is one small red or green cabbage (about 2 pounds). I can't buy half a head of cabbage, but had some other ideas to cook the leftovers. I quartered and shredded half of the cabbage after saving one leaf that is used as a top layer later on.

I'm next instructed to add the cabbage to a large bowl in layers with salt in between. The bowl I used is about 9 inches in diameter and about 2-3 inches deep. Keep in mind that this is just one half of a cabbage. Working with the whole thing would, indeed, take a "large bowl."


Next, we massage and squeeze the cabbage by hand and then pound it flat with the Pickle Packer (included in the fermentation kit from Masontops.) Well, a round-bottomed bowl is not the right vessel for this step. The cabbage keeps spilling out the sides of the bowl, and there is not a lot of flat surface on the bottom to pound it flat against.


I switched to a casserole dish with much better results.


Now, it's time to pack the jar. I'm instructed to fill and pack the jar until it reaches the shoulder of the jar. The pint jars, don't really have a shoulder. I can sort of estimate where that would be compared to a picture of a quart jar in the guide book.

To my surprise, the half a cabbage doesn't come close to filling a one pint jar. Maybe I shouldn't be surprised. The recipe suggested that a 2 pound cabbage almost exactly fills a quart jar. My cabbage weighed in at 26 ounces. Maybe in the future I will weigh out 1 pound of cabbage to work with.


I shredded, pounded, and packed another quarter of the cabbage and had a little left over.

Next, I'm told to take the cabbage leaf that I saved from the first step, set it on the cutting board and, "Set the jar on the leaf, near the top where it is more pliable." The jar is pliable? If you were an English major in college, please leave a comment. This sentence had me confused, at first.

The idea is to cut a circle from the cabbage leaf that matches the inside diameter of the jar. It seems to me that using the mason jar ring is an easier method. That's what I did.


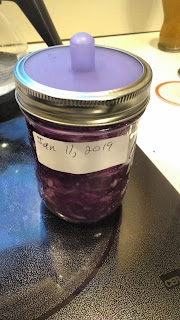
 Now, we put a Pickle Pebble weight on top of the cabbage leaf, and a Pickle Pipe for ventilation and set it on a shelf to ferment. It is supposed to be ready in 2-3 weeks, or maybe a month or more, depending on the ambient temperature.


I'm supposed to wait a day or two to check the progress. If the cabbage and Pickle Pebble is not submerged in liquid after a couple of days, I'm supposed to add some brine. I found that my liquid level was all the way up to the surface of the Pickle Pipe. Maybe I overfilled the jar to start with. I poured off a tablespoon or so of the liquid and put the Pickle Pipe and ring back on.

Everything seems to be off to a good start. We'll check back around the end of January. Cue Tom Petty, "The Waiting is the Hardest Part."

Update: Another day later, and the Pickle Pipe is bulging upward. That's a good sign that fermentation is happening, but some of the purple brine is leaking out, too. I poured off another 1/2 inch or so of the brine to give it some head room. I definitely over filled the jar to start.

Update: 

The harvest was successful. I tried the kraut after about 3 weeks.  It has the pleasant sour flavor that I would expect. It is a little dry. There is hardly any juice in the jar. It's still slightly moist after digging through the top half inch, but there is no fluid that could be poured off. Next time I will need to use a little less cabbage.

I've been eating it raw. Cooking will kill off the beneficial bacteria that I have been trying to cultivate.  I might try cooking with it eventually, but for now it is just an attractive side dish to a meal.

Second Batch:

For my second batch, I planned from the start to use 3/4 of a red cabbage. The whole cabbage weighed about 1-1/4 pounds. My three quarters weighed a little less than one pound. It fit perfectly into a pint jar. After packing, the liquid came up to the 10 ounce mark on the jar.


With the Pickle Pebble in place, there is still some head room.


I'll check in a couple of days to see if it is overflowing like it did before. A more precise fill mark should help with future batches.

Update: After three days, there was some overflow, so the 10 ounce marks is a little too high. The Pickle Pebble was all the way to the top of the jar. Last time, I  poured off some of the liquid, and the sauerkraut came out rather dry. This time, I took out a pinch of the kraut (about 1 tablespoon) and ate it. It's not too bad after just 3 days. I don't think I'm going to wait a month to harvest this batch. Advice I've read suggests that I should taste it to decide when it is done. 

I added some dill and caraway seeds to this batch to enhance the flavor. Those spices were suggested by the recipe. I didn't measure the amount, but estimated it at about 1/2 teaspoon of each. I also didn't measure the salt. The recipe calls for 1/2 tablespoon for a one-pint batch. I used two generous pinches after each quarter cabbage.

Sunday, January 13, 2019

Solid Food - Carrots

The kefir was a start, but I was very interested in fermenting solid food. I bought this wonderful kit from Masontops
OK, technically, I bought it from Bed Bath & Beyond using one of my extensive collection of 20% off coupons. The kit has these very simple "pickle pipes" for venting the carbon dioxide from the fermentation process without letting air back in. Everyone who had reviewed them online seemed to love them.

I chose the Fermented Dilly Sticks recipe from the Masontops web site for my first attempt. For one, Masontops suggested it as a good starting recipe. Second, the product can be sampled after one week. Many of the recipes take several weeks to complete. As a new project, I am naturally eager to test my results. It turns out that Mastontops got the recipe from Cultures for Health, so I'd better give them credit. I kind of wish I had read the Cultures for Health description when I was making my batch. Their explanation of how to put the garlic in makes more sense.

Given my supplies, I needed to modify the recipe a bit. The recipe uses 1 quart mason jars, and I bought 1 pint jars. I don't want to over commit to something that I might not like. That change was easy enough. Just divide everything in half. I thought about using some pre-packaged, ready-to-eat baby carrots, but decided to stay closer to the instructions to increase my chances of success.

I bought whole carrots and sliced them in quarters, sort of. I needed to leave 1-2 inches of space in the jar, so I got out a ruler and measured from the counter top to the top of the jar. I needed 3 inch long sticks. I cut one and used that as a guide for the other cuts. The fat half of the carrot could be cut into 4 sticks, but the narrow end was too skinny for that. I cut those in half.

Dividing the recipe in half works fine except for things like 3 cloves of garlic. I rounded up to 2. Then, there was the 3 small sprigs of dill. My dill is already dried and crumbled. Well, you can search for the answer to just about any question online these days. "How many teaspoons in a sprig of dill?" comes up with the answer of about 1/2 teaspoon. I used a heaping 1/2 teaspoon.

Now, the recipe calls for 4 cups of filtered water and 3 tablespoons of sea salt. No problem with dividing that in two, but I didn't want to bother with the filtering. Some guides suggest that chlorine will disturb the fermentation process. I looked up the water report for my local utility, and they say there is less than 1 part per million of chlorine. I'm satisfied with that.

For the sea salt, I am using kosher salt. I already had some. It doesn't contain iodine or any anti-caking additives, so I think that is going to be a satisfactory choice.

2 cups of water was far more than I needed. I still had a cup left over. Maybe I'll try 1-1/3 cups of water with 1 tablespoon of salt, next time.

OK, here is my result.

It's been sitting on the counter for a couple of days, and I see some bubbles rising up from the bottom, so I think the fermentation has begun. The recipe suggests trying them after a week if you like them crisp. Sounds good to me. Watch for an update on Thursday or Friday.

Update: I tried one after 7 days. It tasted pretty good, but still quite salty. I'm going to leave the rest to ferment for another week. There are bubbles coming up from the bottom of the jar, so there is some fermentation going on.

Second update: After 16 days, I took off the Pickle Pipe and fermentation weight. I'm considering this batch to be done. They mostly taste like salty wet, but still crispy carrots. I'm not sure that there was that much fermentation. I might try this recipe, again, but I'm not that impressed with the first try.

Saturday, January 12, 2019

Homemade Kefir

My first attempt at fermenting foods at home was to make my own kefir. For starters, store-bought kefir is about 5 or 6 bucks a quart. Second, I wanted to control what went into the kefir.

Normally, kefir is made from "grains." These grains are not like the grains that we make bread out of. They are sort of rubbery or spongy cultures of bacteria.


By A. Kniesel - Fotografiert von A. Kniesel, CC BY-SA 3.0, Link

I was wondering if I could make kefir by using a little bit of the store-bought kefir that I had in the fridge. After all, that is how I use my sourdough starter. I found this video online.


I didn't heat my milk when I tried it, and I didn't make a whole gallon of it. I used 1 tablespoon of kefir and one cup of milk. I mixed them in a mason jar, and put it in the warmest room of the house.

Now, setting a cup of milk out on a shelf for a day or two, and drinking the result seemed a bit counter intuitive. I wondered how I would know if I made kefir or just sour milk. These days, you can ask just about any question on Google, and you will find someone who has asked the same question. Well, anyway, after a couple of days, I had something that had thickened up and sort of smelled like the store-bought kefir. I put it in the fridge and took it out the next day for a taste. I decided to toss some pomegranate seeds into it and made a nice photogenic snack.


It tasted good, too. Chalk up one success.

Now, some of the comments in the video suggested that I made yogurt, and not kefir. Well, presumably it had the same active cultures in it, and it tasted good. I was happy with the product, but I figured that I ought to try making kefir from grains.

More on that, later.

Why Fermented Foods?

I recently read The Good Gut by Stanford researchers Justin and Erica Sonnenburg. The book is about caring for your microbiome, the microbes that inhabit your gut and keep you healthy.


One of their recommendations is to eat more fermented foods that are full of beneficial live cultures. I started by trying kefir, a fermented milk product that can be found in most grocery stores. My local store has this brand.

It tastes pleasant enough, and I have already noticed a difference in my...um...end product of digestion.

With regard to other fermented foods, there is sauerkraut, but I'm not sure if the sauerkraut that I buy at the store has live cultures in it to feed my microbiome. Supposedly, it is possible to find fermented pickles in stores, but I haven't hunted for them. 

Not only that, man does not live by kefir and sauerkraut, alone. (I hope.) I've decided to try fermenting my own foods at home. It is supposed to be easy. My wife is thinking, "Oh boy. This is going to be the year of weird food." Well, maybe, but I'll give it a shot.

Growing my own micro-organisms for food production is not totally new to me. I've been making sourdough bread for many years. I raised my latest starter from the wild. The story of my sourdough adventure is described in my other blog, The Sourdough Chronicles.

My first attempt was to make my own kefir.